About these Photos
Home > About these Photos
| About these Photos |
|
Home > About these Photos | |
|
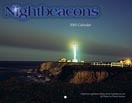
Our eyes sense light with with cells called rods and cones. The cones perceive color in bright light. Rods perceive black-and-white images and work best at night. Cameras, having neither rods nor cones, record the same rich, vivid colors equally well day or night. Such colorful evening images reveal the magic of night photography.
Unless otherwise noted, no filters or flashes were used to create any of the images on this site. Each photo was exposed using only the existing light. Film and EquipmentI use very simple equipment to create these photos:

For 99.9% of my work, I prefer manual cameras, such as the Pentax K-1000. For me, it's significantly easier to set a manual camera for very long exposures. (For long exposures, digital cameras don't seem to produce as high a quality an image.) Manual cameras are also quite a bit cheaper to repair and clean. (Blowing beach sand and salt wreak havoc on automatic and digital cameras.) These all-metal cameras are built like tanks, but not particularly fun to carry on a long hike to a lighthouse.

Before I became interested in night photography, I had never used a light meter. I simply relied on the camera's built-in light meter. A good light meter can measure much lower light levels, and gives you a much better starting point for determining a good exposure. I've also relied on a simple microcassette recorder for taking notes in the field. (My favorite has a voice-activation option.) Before buying on of these, I had to juggle a flashlight, pen, and pad (often in high wind) to record exposure settings. With this inexpensive device, I merely "talk into my vest pocket" to record this information (and transcribe it as soon as I'm indoors). FilmWhile camera, timer, and light meter are all constant companions, the choice of film can vary. This factor gives you the greatest opportunities for creative expression. (It can also give you the greatest opportunities for really messing things up.) Different films react to light in different manners -- and these differences often become pronounced in low-light conditions. For nearly all of the photos on this site, I used Professional-grade color slide film, with speeds between 50 and 64 ISO. I've also had success with films used for astrophotography, such as Kodak's EPH-1600P. CompositionRather than point/focus/shoot, I prefer to compose a photo by wandering around the grounds, taking my time, looking for vantage points that "feel right" or make me say "wow." (Of course, wandering around isn't always practical at some lighthouses.) On many occasions, this method will reward you with some suprisingly nice views. The Cape Disappointment photos, for example, were taken after I made the long round-trip hike to the lighthouse. Before heading back, I wandered around the Lewis and Clark Interpretive Center (about 20 yards from where I parked) and found these views. More info...If you'd like to learn more about these photos, please feel free to contact me. |


Last modified: May 14, 2005 |
All images Copyright 2002 - 2026, Charles Jackson | ||